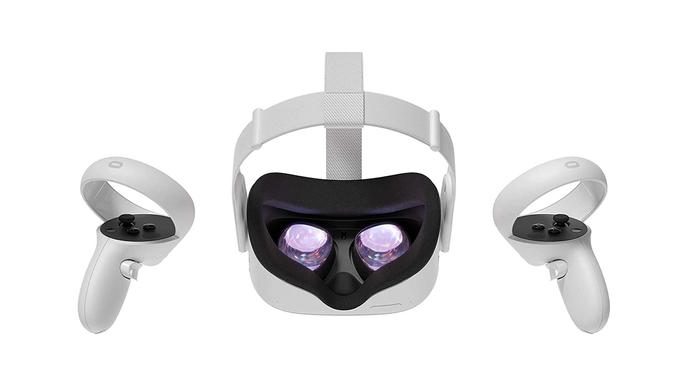
How To Play Minecraft On Oculus Quest 2: Our Step-By-Step Guide

If you'd like to know how to play Minecraft on Oculus Quest 2, we've got you covered right here.
Minecraft has been around in various different guises for a rather long time, and putting it into VR can help to make it one of the best VR indie games out there.
The problem is, there isn't an officially released VR port, but getting Minecraft onto Quest has been made easier thanks to the beta release of QuestCraft, the first standalone version of Minecraft for the platform, as well as the existing Windows 10 port.
Here's how you can play Minecraft on Oculus Quest 2.
How To Play Minecraft On Oculus Quest 2
When deciding which version to play, you do have a couple of options: either, you can utilise Minecraft on Windows 10 with the Bedrock Edition, or via the Java Edition with QuestCraft.
How To Play Minecraft VR On Windows 10
Step 1: If you don't have it installed already, download Minecraft for Windows 10 from the Microsoft Store.
Step 2: Once it's installed, you'll need to connect your Quest 2 to your PC, which can be done either via Oculus Air Link or via the Oculus Link cable.
Step 3: Once you've sorted this, then you can launch it and play a fully stable version of Minecraft in VR.
Just note, you of course need one of the best gaming PCs or best gaming laptops to get the best VR gamingexperience.
Read More: How To Connect Oculus Quest 2 To A Laptop
How To Play Minecraft VR Using QuestCraft
It is also possible to play Minecraft just using the Quest 2 as a standalone headset thanks to a new port of the game's Java Edition via the newly-released QuestCraft port.
Before going any further, it's worth noting you'll need to own Minecraft: Java Edition before installing QuestCraft since this port essentially wraps the original game and allows it to be played on Quest.
In addition, as this isn't technically an official game for Quest 2, you'll need to know how to connect Oculus Quest 2 to SideQuest and sideload applications onto the headset, for which we've linked the separate guide for your own convenience.
Step 1: Navigate to SideQuest's Github page and download both the 'app-debug.apk' file and 'extracttoroot.zip' to your PC.
Step 2: Connect your Quest to your PC and install the APK file onto your Quest.
Step 3: Extract the Zip file and you'll find a folder labelled 'net.kdt.pojavlaunch.debug'. Inside the Zip file, it's stored in an Android/Data folder, which you'll need to copy over inside the same Android/Data folder onto your Quest where other apps are stored.
Read More: How To Play Roblox On Oculus Quest 2
Step 4: Head into Unknown Sources on your Quest and open the PojavLauncher. From there, you'll be prompted to log into your Microsoft or Mojang account.
Step 5: Once logged in, you can go into Settings and then into Videos & Renderers and press the third option down.
Step 6: You should now be inside the launcher, from which you can choose a version of Minecraft for it to install. When choosing, just make sure the one you've picked begins with 'fabric-loader' which may be last on the list.
Step 7: Press 'Play'. The launcher will then download, install the game and launch which means Minecraft should be playable on Quest 2.
Read More: How To Add Multiple Accounts To Oculus Quest 2
Do I need to install any mods to get QuestCraft to work?
Whilst QuestCraft will work on its own, as it's in a beta stage, the developers have recommended you install a couple of mods in order to optimise performance.
To install them, simply download the .Jar files from the Github page, connect up your headset and drag and drop the mod files into your Quest's Minecraft mod folder, which can be found at '/Android/data/net.kdt.pojavlaunch.debug/files/.minecraft/mods'.
Then, connect your Quest and copy the Jar files into the mods folder on your headset. Once you boot up QuestCraft again, they should be automatically applied.
Read More: Best Oculus Quest 2 Accessories 2022: Our Top Picks
How do I restart the QuestCraft launcher?
Sometimes you may need to restart the QuestCraft launcher as the game can be just boot into an infinite loading screen sometimes.
To restart the launcher, you'll need to close the app entirely. You can either achieve this by pressing the small 'X' in the corner or restarting your Quest, which will arguably be better.
So, there you have it, that's how you can get Minecraft working on your Oculus Quest 2, either as a tethered or standalone headset.
Read More: How To Connect Oculus Quest 2 To A Phone
Gfinity Esports is supported by its audience. When you purchasethrough links on our site, we may earn an affiliate commission.Learn more.Looking for specific products? VisitStockinformer.co.uk / stockinformer.com.ncG1vNJzZmivp6x7qLLIp6CtsZWovbC%2B06xlnKedZMOze8eormasn2K9ra3YZqSippWYv6Ky02amp2WfmMKtwdJmqK6do6l6c3nJmq2aZZWZtrW1zqdkqJulocK0ecCiqWakmaO4cA%3D%3D